Every year my dad gets a box of these apples as a holiday gift.
Too bad the rest of my family tends to think of them as some sort of punishment. Why is that? Because what are we supposed to do with 50lbs of red golden delicious apples? They look really pretty, but they are not the best tasting thing you've ever had.
So, on the morning of the 25th, my mom was deciding what desserts she was going to make (yes, that's desserts, plural), and my dad said, "Why don't you make something with apples." We had tried to make apple pie with these bad boys one year, and the result was less than satisfying. But, I remembered that SK has an entire section of her blog dedicated to apples, so I figured I could find something useful there.
In the end, I settled on Deb's mom's apple cake. She is right. This cake is very moist and incredibly tasty. I dare say this is the best thing we've ever done with our annual inundation of apples.
Why then, did mine turn out to be more of a bread pudding (hence the casserole-like pan)? Well, there are many possibilities. Here are the two most probable. First of all, I used 6 apples like the recipe called for (heck, what else are we going to do with them) even though these apples weigh about a pound each. The result was a greatly extended cooking time.
Second, and I only realized this after I went back to the SK website to make this post, I mistakenly tried to flip the cake out of the tube pan instead of serving it upside down like the picture shows. The result? Well, the cake fell apart at the middle apple layer. And because I couldn't very well fix this problem with frosting, I decided to put the cake in a different container. At the time, I decided I would only repeat this recipe in a container like this to begin with. But now that I see that I was never supposed to flip it out of the pan to begin with, I think the tube pan method will produce a very manageable, delicious, and pretty cake.
Sunday, December 27, 2009
Apple...Bread Pudding?
Tuesday, December 22, 2009
A Nice Thing to Have Around

A couple days after Thanksgiving, I made these buttermilk biscuits because I didn't want to waste the leftover buttermilk. I ate one at the time and put the rest in the freezer. Since then, I've been eating them for dinner with eggs and cheese. I wouldn't call them the best biscuits ever, but I will say that the idea of having them in my freezer made me really happy. So, with this as the starting point, I would like to solicit ideas from you and yours on how to make the best biscuit.
The problem with these? They were good but they sort of tasted like pancakes in biscuit form. I guess more salt, less sugar (though I only used 1 tablespoon to begin with) is a starting point, but i am sure someone can give me the key to a homemade egg 'n cheese sandwich.
Wednesday, December 16, 2009
S'more Bites Are My Winner

Look at those. Just look. Don't they look delicious? Aren't they pretty? And let's pretend you were a judge in a cookie contest. Wouldn't you vote for these amazing treats? Of course you would. You appreciate homemade marshmallows and graham crackers. Unfortunately, you were not the judges in my unsuccessful bid to win my office's first annual cookie contest. In retrospect, this choice may not have been the most appropriate for the audience, but that's okay because I loved them. And that's what matters. But next time, I will save my confections for a more appreciative audience.
Do you want to know how to do this? Fortunately, it's not that hard.
Ingredients:
- For the marshmallows, look here.
- For the graham crackers go here.
- One bag of good quality milk chocolate chips (11.5 oz?). I used Ghirardelli
- One big bar of bittersweet chocolate. Again, I used Girardelli.
A few notes on the ingredients:
In a recent trip to Penzey's HEB convinced me to buy double strength vanilla extract. The bottle says to use half the amount the recipe calls for or, for special baked goods, use what the recipe calls for. I decided to use the full amount from the original recipe in the marshmallows, and it was amazing. It's definitely worth the extra flavor there, but not in the graham crackers.
And as for the graham crackers, I had a mild disaster. I could not find any graham flour at 3 grocery stores in Chicago. I had to make one batch with graham flour and one without. This process actually taught me an important lesson - regular flour is superior for the limited purpose of making these s'more bites. Why? They cooked a little more solidly and generated many fewer crumbs, which made for better cutting. I'd still prefer graham flour for the graham crackers standing alone.
Finally, don't skip the bittersweet chocolate. You need it to cool down the chocolate when you temper it (more on that later).
Instructions:
1. Spray 13 x 9 pan with cooking oil. Line the pan with parchment paper. Spray the paper, paying particular attention to the sides.
2. Follow the graham cracker recipe to make the graham cracker dough. Instead of making them into round cookies, take about 2/3 of the dough and roll it out in the bottom of the 13 x 9 pan. You can't really use a rolling pin to roll out dough inside a pan, so I used a glass, and it worked great. You could even use your hands if you have to. Bake the graham cracker layer at 350 for about 12-14 minutes. Make the remaining dough into graham crackers that you can eat for instant gratification.
3. While the graham crackers layer is in the oven, make the marshmallows. Pour the marshmallow mix directly on top of the graham crackers and it let sit until the marshmallows are firm (at least 4 hours, I let it sit overnight). Sprinkle the top of the marshmallow with the potato starch/powder sugar mixture before you remove the layers from the pan.
4. Flip the marshmallow/graham combo onto a cookie sheet to remove from the pan. Remove the parchment paper. Flip again onto a cutting board. This second flip is important. I tried cutting these marshmallow-side down and the crumbs from the graham crackers stick to the marshmallows, which looks ugly.
5. Cut the m/g combo into 1 x 1 squares. A large serrated knife works best for this, and you will need to clean it off pretty regularly to keep graham cracker crumbs from sticking to it.
6. Dip the marshmallow portion of the m/g combo into the potato starch/powder sugar mix you made in step 4. Shake off the excess. Try not to get the mixture on the graham crackers. It doesn't do any harm, but it makes them less cute.
7. Prepare the chocolate. After some research and a couple failed tests, I decided the best method was to temper the chocolate. I read some instructions on how to do this online, and found myself pretty confused. I think the basic idea is to get the chocolate just hot enough to melt, and then to cool it down before you begin dipping. How do you do this? There is some complicated version that requires fast hands and a marble slab. Instead of that, I melted the milk chocolate in a double boiler and then added cold bittersweet chocolate to the melted chocolate to cool it off. This seemed to work out fine. Once your chocolate is ready (apparently 88 degrees is the temperature you want...), dip the bites and set them on a plate to cool.
Sunday, December 13, 2009
Onion Tart
For an appetizer on Thanksgiving, we had this delicious onion tart. I think many of the diners found this to be the best part of the meal, which is sort of funny because it's the tart that almost wasn't. I asked my parents if we needed an appetizer several days before the meal. They both replied that they thought we'd have plenty of food. And then, a few days later, my dad called to ask what my "plan" was for a starter on Thanksgiving, leaving no indication that we'd had the previous conversation. Thanks to Deb, I had this recipe in my back pocket and wanted to give it a try.
We made the onion mixture the night before. We had more than we needed so my dad put the leftovers in the gravy. Then we made the dough as part of our baking morning. I tried to put this tray in my refrigerator, but it didn't fit so we covered it in foil and put it on the balcony until we were ready for it to go in the oven.
Sorry about these lack luster photos. This dish went from this:
to this:
in about 30 seconds (minus, of course, the baking).
Thursday, December 10, 2009
Pasta Salad w Chicken/Spinach/Peppers

As i said below (if you read bottom up), i made two things tonight, here's the second. much more chopping involved. nothing like a pasta salad for a potluck.
The recipe is from about.com, it came out pretty decent i think. I followed it fairly loosely, don't think it really matters in pasta salad and i definitely went a little lighter on the Mayo.
* 8 ounces fusilli or rotini pasta
* 1 cup coarsely chopped spinach
* 1/2 red bell pepper, diced
* 1/4 cup diced onion
* 1 medium clove garlic, finely minced
* 2 to 3 cups coarsely chopped chicken (i boiled it)
* 1 to 1 1/2 cups mayonnaise
* 1 tablespoon white wine vinegar
* 2 tablespoons lemon juice
* 1 teaspoon Dijon or a favorite gourmet mustard
* 1/8 teaspoon ground black pepper
* 1/2 teaspoon dried leaf basil
* salt, to taste
Cook pasta following package directions; drain and rinse well.
Toss cooled pasta with the spinach, red bell pepper, onion, garlic, and chicken.
Combine 1 cup of the mayonnaise with wine vinegar, lemon juice, mustard, pepper, and basil. Toss with the pasta mixture. Add more mayonnaise, if needed. Taste and add salt, if desired. Refrigerate for at least 2 hours before serving time for best flavor.
and since i'm proud of all my chopping, here it is:
Chicken wrapped in bacon

Well, tonight in anticipation of two more upcoming potlucks i went all out and made two dishes this evening. this one was pretty darn simple but it was also pretty good. how bad can anything be that has brie and bacon as part of the ingredients.
The real reason why i made this was that i bought a meat mallet at Ikea and really wanted to pound some chicken. Anyways here's the super complicated ingredient list:
Pound chicken to 1/4" thickness. Put brie in middle, put spinach in middle, fold over twice to keep Brie in the middle. Wrap in bacon, use toothpicks to secure if you wish.
Broil for 7 minutes, turn broil for 7 more minutes. take it out, let it cool a few minutes, enjoy!
and here it is raw:
Monday, December 7, 2009
You're So Damn Hot
A few months ago CH and I went to our new favorite southside restaurant and ordered a spit-fire-hot garlic soup. The soup was so spicy that they served it with a beer to help you cope. And, the chef even came over to warn us not to drink all the beer because we’d need it for the soup (we were sitting at “the kitchen table”). After the initial shock, the soup was delicious. It made your mouth burn, but the heat said “give me more” and not “kill me now.”
And then, at the beginning of soup season, CH decided to make this garlic soup. It was good, but it’s nothing like the fiery version we’d had. So, the next time we were at the restaurant, we asked about what they did with the soup. We wanted to know if the peppers were roasted, seeded, etc. The chef explained how to do it. And then he gave us these:
...along with a warning to handle them with care.
Having never received ingredients from a restaurant before, we decided to give it a whirl. If I do say so myself, I think we did a decent job of replicating the soup. In terms of special equipment, this soup may not need goggles, but rubber gloves would probably come in handy.
As for the recipe – We followed Smitten Kitchen’s recipe except we got rid of the thyme. We roasted two habaneros at the same time as the garlic, but in a different container. Once they were roasted, we took out the seeds and took off the stems. We thought about taking off the skin, but it was too much work, so we just put them in the pot with everything else and blended them all together with CH’s handy immersion blender.
Wednesday, December 2, 2009
Thanksgiving: The Main Event
 Of course, Thanksgiving involved turkey. I got a fresh turkey because I didn’t want to deal with the hassle of thawing it.
Turns out, I should have also thought about the hassle of brining. I believe some of you know the story of my first brining attempt with my dad. He had spent hours the day before making the brine (it has to be cold before you put the turkey in it, so you have to do it in advance), but when we tried to move the bag with gallons of liquid and a 25 pound turkey out of the sink it was too heavy and we spilled all the brine everywhere. Well, there was no way I was going to let that happen to me. I knew I had to add the brine to the turkey while it was in the fridge because it would be too hard to move it after the fact. That did solve one problem, but it meant I had to add the brine one glass at a time. Things were going well until the end when the bag started to get full. I couldn’t fill the glass and hold up all the sides of the bag. Despite my best efforts, I still spilled brine everywhere. It was in the vegetable drawer. It was all over the floor. And even a week later, the light in my refrigerator still delays in coming on because the button is sticky from residual brine I can’t seem to get off. It was a disgusting mess, but fortunately I didn’t waste too much and the turkey turned out quite delicious.
 Also, You see how that bag says “gourmet made simple.” That is a lie. Brine bags, which are glorified ziplock bags, are anything but simple.
Oh, do you actually want the recipe? Hmm. My dad did most of the work, so what follows is my best guess.
The brine recipe came from here. My dad rinced off the brine and cooked the bird. Basically, he patted the brine off, and seasoned it with a bunch of spices and some butter. He cooked it breast side down for an hour, then flipped it for the remaining time, covering the top with foil so it wouldn't burn. He stuffed it with vegetables, which we then ate.
Tuesday, December 1, 2009
Thanksgiving Desserts
 The dessert menu for Thanksgiving included SK's silky pumpkin pie and a luscious looking ginger pear cake. Both were topped with homemade whipped cream.
As someone who spends more time baking than cooking, I definitely contemplated these two additions to the Thanksgiving table more than any of the other components. It's sort of a shame though - by the time dessert comes everyone is so full nothing tastes that great. And, for a dinner party of seven people, it was sort of ridiculous to make two desserts. It proved even more ridiculous the recipe for pumpkin pie I followed yielded nearly two pies. So now, I have a pumpkin pie in the freezer. We'll see if it lasts. The reason for the two desserts? My family never has pumpkin pie and I'm still not really convinced I like it. That said, it's certainly a classic of the day and was voted as "non-optional" by at least two of my guests. Which brings me to another Thanksgiving lesson: don't take requests. Your guests will eat what you serve, and like it.
Anyway, here are the recipes and my comments.
Ginger Pear Upside Down Cake:
I got this recipe from Macrina Bakery after stumbling on it on the Seattlest website. I followed it pretty much to the letter. I even emailed the bakery because the baking time seemed to be ridiculously long for a cake in my view. It was a tiny bit long, but not by much. Overall, I really liked this cake, but it doesn't taste much like ginger. In fact the ginger flavor is barely noticeable. That said, it's still really tasty. If I make it again, I might try to add some candied ginger on top, incorporate ginger powder, or something like that.
If you attempt this recipe, here are some important tips. First, make sure you put it on a cookie sheet, and if you're smart line that sheet. The bottom of the spring form pan is filled with a sugary liquid that will ooze out a little. Second, make sure your pears are very ripe but not over ripe. Third, I think it tastes best warm. It was not warm on thanksgiving when I served it, but I have been eating it periodically over the past few days, and I've liked it microwaved for about 30 seconds and topped with whipped cream. Silky Smooth Pumpkin Pie:
I got this recipe from SK, and tried to follow it to the the letter. I used this pie crust on her suggestion, without the shortening (though it appears she has since changed to a different pie crust). Since I don't think I've had pumpkin pie since I was 12, I'm not sure how it compares to other recipes. But one of my guests, who is not easily pleased, proclaimed "this is excellent pumpkin pie," so I guess that counts as a success. For me, I might add in some of the traditional pumpkin pie spices that were absent from Deb's version. However, I will say that the straining was definitely worth it. My biggest gripe with pumpkin pie has always been that was dense and grainy. This pie lives up to its silky smooth title.
Whipped Cream:
I usually think whipped cream is a waste of calories, but I have to admit that when it's homemade and fresh, I really like it. All I did was put it in the mixer with the wisk beater. I added sugar and about a teaspoon of vanilla and kept the mixer going until it was stiff.
Thanksgiving Debrief

I am happy to report that I survived my first Thanksgiving as hostess, and I even enjoyed the non-stop cooking. The process was certainly made more enjoyable and feasible by the presence of my parents, both of whom are more talented in the kitchen than I. The food was delicious, and the company quite pleasant. And while I am not going to jump at the opportunity to host again next year, there is no small amount of joy in putting together a whole meal like this.
In addition to posting the recipes and my comments about them, I feel like I should share a few of the lessons I learned, for the inevitable day when you too have to host Thanksgiving dinner. Here’s the menu. I will post the recipes separately and link back as I go.
Cranberry Sauce
Parmesan Bread
Mashed Potatoes
Sweet Potatoes
Stuffing with Sausage and Mushrooms
Green Beans
Roasted Carrots
Cider Brined Free Range Turkey with Gravy
~ Dessert ~
Pumpkin Pie
Ginger Pear Upside Down Cake
Fresh Whipped Cream
And keep reading for a few lessons learned:
1. Make sure you have the equipment you need. I realized (fortunately in advance) that I did not have many things you might want/need to make this meal. Some non-obvious (to me at least) things you will need: (1) a meat thermometer (you may remember what happened to mine), (2) pie weights or some alternative, (3) a big ass fork to pick up and rotate the turkey while it is still cooking, (4) obscene amounts of tupperware for all of the leftovers.
2. Plan out the timing. This is the first time in awhile where I cooked a meal of this size in a house with only one oven (I know, I’m a spoiled brat), so that means you have to think about what you can do in advance and how you will position your oven racks. Here was my advance game plan: I made the cranberry sauce, the slushy, and the brine for the turkey on Monday. On Tuesday, I put the turkey in the brine and made the pie crust. On Wednesday afternoon I made the dough for the bread, made the onion topping for the tart, peeled the carrots, grated the cheese for the onion tart and bread, and trimmed the green beans.
3. Don’t overcook your turkey. This is clearly obvious, but thanks to my dad, I learned a bunch of ways to achieve this important goal. First, cook the turkey upside down for the first hour. This keeps all of the juices from running out of the white meet. Second, don’t stuff your turkey with stuffing. It sucks up the moisture from the bird. Instead, put your carrots, along with an apple and an onion inside the bird.
4. Try not to think about the butter content of the meal. It’s obscene and gross. Just try not to think about it.
5. Print out your recipes. My mom and I were working on the two desserts at the same time and tabbing back and forth on my computer between the two recipes. When she asked me “how much brown sugar in the pumpkin pie” and my answer was “zero brown sugar,” I accepted the perils of this plan. Especially if you’re going to have multiple cooks, printouts are a good way to avoid catastrophe.
Friday, November 27, 2009
not port wine sauce
 RJ's recent chicken post inspired me to type up a ravioli sauce that I made couple of weeks ago. It was remarkably simple and turned out pretty well. The idea came from a sauce I had at Viva Fresh Pasta, which I visited with EW and then with my mom. If you're ever in Northampton, you too should go!
1/ Over medium-high heat, reduce about half a bottle of red wine to a half cup. (I used some Malbec that I'd opened before I got ill and then had never drunk. The fact that it had been open for over a month didn't seem to matter.)
2/ Pour reduced wine into a bowl; set aside.
3/ In same pan, heat about 2 tablespoons butter over medium heat. Once butter is melted, add about 2 tablespoons brown sugar. Stir.
4/ When sugar begins to caramelize, pour the reduced wine back into the pan. Stir thoroughly.
5/ Let the sauce caramelize until desired consistency.
6/ Add salt and pepper to taste.
7/ Serve over ravioli (I used butternut squash).
I think that it was a mistake to top these ravioli with parmesan. When I reheated the leftovers, I didn't and I thought that it was much better. If I wanted to be fancy, I might caramelize some walnuts or pecans and maybe some onions to top the ravioli.
Monday, November 23, 2009
Cast Your Vote
Ok people. My work is having a cookie contest, and I have a reputation to uphold. So, I need some suggestions. There may be a cash prize, if it turns out that's allowed. Tell me what to make. Vote on one of these, or suggest an alternative.
Current Contenders:
Rugelach
Molasses Spice Cookies (maybe in the shape of ginger bread men)
Lemon Cookies
Peanut Butter Brownies
Ameretti Cookies
Salted Chocolate Chip
Some inventive version of the PB bars and graham crackers.
Help!
It's True: Jack-o-Lanterns Are Not For Eating

Remember when I commented that, apparently you're not supposed to eat the flesh of regular, Halloween type pumpkins? Well, I should have listened to that advice. I had in my freezer the roasted flesh of a pumpkin my parents grew in their garden, so I decided the time had come to make it into soup.
I followed this recipe, but to be honest, I thought it was boring and flavorless. So, I added curry powder, tumeric, cumin, and pepper at random and in bits until I got something that was edible. The end product was okay, but given all the amazing soups there are in the world, I would not repeat this endeavor, especially when delicious pumpkin-like soup is not difficult to produce.
In other news, the Thanksgiving preparations have begun. Many blog entries to follow. And, CH and I have a tale from our new favorite restaurant. Stay tuned!
Thursday, November 19, 2009
French Onion Soup
It's taken awhile to get here, but it's finally autumn in Chicago (no doubt soon to be followed by months of blistering winter). Anyway, everyone knows autumn is soup season, so I have a couple of soup posts to share. This is probably my favorite soup, and though it calls for beef broth, I know I made it with vegetable broth when EW was my roommate. And, if you have a food processor, this soup is actually really easy to make.
This is my mom's recipe, which she says she got at Famous Barr when she and my dad were first married. Still delicious even 40 years later. And, to be fair, someone else deserves credit for this post since she has made this soup much more recently than I have, and in the process she came up with a must try technique for all of us. Keep reading ;)
Ingredients:
- 5 pounds thinly sliced onions
- 1 stick unsalted butter
- 1 1/2 teaspoons freshly ground pepper
- 2 tablespoons Hungarian paprika
- 1 bay leaf
- 3/4 cup flour
- 3 quarts beef broth
- 1 cup win (Sherry)
- Crusty French Bread
- Gruyere
Instructions:
1. Slice onion thinly in a food processor.
So, right here at step 1 is where our friend's secret technique comes in handy. Chopping onions makes you cry. It even made my cat cry when I was chopping onions recently. That is, unless you do this:
If you don't have any use for swim goggles but appropriately think this idea is genius (as you should), consider these.
2. Melt Butter in a large stock pot and add onions.
3. Sweat the onion over a low heat for a 1 ½ hours.
4. Add all the other ingredients except the beef stock to the onions.
5. Cook for about 10 minutes over low heat stirring to keep from burning. This is to keep the flour from lumping.
6. Add beef stock. Cook for 2 hours over low heat.
Serving Instructions:
1. Set oven to broil.
2. Place a generous slice of Gruyere cheese in the bottom of an oven safe bowl.
3. Add soup.
4. Place a piece of French bread on top of the soup. Cover with thinly sliced Gruyere.
5. Place in the oven until the cheese is melted.
Tuesday, November 17, 2009
Chicken with Cranberry sauce
Season the chicken breasts on both sides with ample salt and pepper. Put a handful of flour in a pie pan or other sided plate and position it near the stove. Combine the sauce ingredients of your choice in a 1-cup Pyrex measuring cup or small bowl. Heat 2 tablespoons of the butter and the oil in a large skillet over medium heat. Dredge one of the chicken breasts in the flour, coating both sides well but shaking off any excess. Increase the heat of the pan to medium high. Before adding the chicken, test the heat of the pan by flicking in a little of the dredging flour. If the flour sizzles enthusiastically and immediately turns golden, the pan is ready. Add the first floured chicken breast. Then quickly flour the remaining breasts and add them to the pan. Cook for about four minutes without moving the breasts. Then, starting with the first one in the pan, turn them over and cook for another three or four minutes on the other side. Transfer the chicken to a plate or plates and keep it warm. Add the pan sauce ingredients to the hot pan and boil, stirring and scraping up the browned bits in the bottom of the pan, over high heat until the liquid is reduced by half. Add the remaining tablespoon of butter and whisk until smooth and glossy. (Tilt the pan to bring the small amount of liquid to one side while you whisk in the butter.) Spoon the sauce over the chicken and serve immediately. 
So, partially due to some positive feedback from the chili, for potluck #3 in addition to the Trader Joes stuffing from a box, i decided to give a shot at this peppered chicken with cranberry sauce. People once again at least pretended to like it, and ate most of it. As with my crochet attempts, i don't go for fancy, just enough to look like i tried.
Recipe also came off the Internet.
Chicken:
4 trimmed boneless, skinless chicken breasts
Kosher salt and freshly ground black pepper
Flour for dredging
2 tablespoons unsalted butter
1 tablespoon vegetable or olive oil
For the cranberry sauce:
1 cup port wine
4 tablespoons dried cranberries (Craisins!)
2 tablespoon seedless raspberry jam
1 tablespoon butter
Directions:
Sweet Potatoes Are Not Just For Fries and Thanksgiving

Gnocchi are one of those things that, even though they require very few ingredients, they are seemingly impossible to make. And, they require special machinery (a potato ricer). But, the last issue of Gourmet that came to my house (sad) had this recipe for sweet potato gnocchi, and I decided I had to try them. The recipe calls for a potato ricer, which I do not have. Luckily, neither does Deb. She has a post about making gnocchi with a box grater. Rejoicing the work-around, I decided to give her method a try on Gourmet's recipe.
I must say, the process was trying. I feel like I needed a lot more flour than they called for, and eventually I decided to switch to potato flour. That said, I was careful to follow Deb's instruction to add it a little at a time and only add as much as necessary, so I don't think I over did it. Another problem: sweet potatoes are not exactly the same texture as russet potatoes, so it was impossible to get a completely uniform mix.
And, I know that I am a messy cook, but these were even more messy than most of my usual ventures (except perhaps the marshmallows).
But then there is the finished product. It's actually quite good. It's not amazing, it's not A Tavola, but it is something I am happy to have in my freezer. It might not even really be properly classified as gnocchi since they are sort of a finer texture version of hash browns. Also, one of the things that makes these delicious is that, when you put them in the skillet with the brown butter, they get a little crispy on the outside, which improves them even if it does make them more hash brown than gnocchi.
Moral of the story - I will try this method again with only russet potatoes. And, I will try to figure out a less greasy but still delicious sauce (The greasiness of the sauce probably just has to do with the fact that, though I tried, the sauce is not easy to prepare in single serving portions.)
(Source Gourmet: October 2009)
Ingredients:
- 1 1/4 lb. russet (baking) potatoes
- 3/4 lb. sweet potato
- 1 large egg
- 1/2 tsp. grated nutmeg (I didn't have fresh nutmeg, so I used equal amount ground)
- 1 tsp. salt. + more for sauce if you want
- 1/2 tsp. pepper
- 1/3 cup Parmesan plus more for serving
- 1 1/2 cups all-purpose flour plus more for dusting. (I am guessing I needed nearly 2 cups, but you just have to add it slowly. Deb says only add until the dough stops sticking to your hands. I stopped adding when it was still a little sticky and relied on the dusting to compensate.)
- 1/3 cup olive oil
- 1 cup sage leaves
- 1/3 cup bottled roasted chestnuts, thinly sliced (I did not use these because I don't really like chestnuts. I didn't substitute anything either...)
- 2 Tbsp unsalted butter
Instructions:
1. Pierce the potatoes and bake in oven at 450 until just tender, (45 minutes to an hour).
2. Cool potatoes slightly, peel and grate. (Gourmet says to let potatoes cool completely, they were still warm but not very when I moved on). Spread the grated potatoes out on a sheet pan.
3. Beat (lightly) egg, nutmeg, salt, and pepper in a small bowl.
4. Gather potatoes into a mound and make a well in the center. Pour the egg mixture into the well. Knead in cheese and flour. Don't overwork the dough, but keep kneading until it isn't sticky to the touch.
5. Cut dough into 6 pieces, and, one at a time, roll out the pieces into ropes that are 1/2 inch thing. Cut the rope every 1/2 inch (to get squares). Gently roll into balls and dust with flour.
6. Add ridges. I tried this step, but failed miserably. Basically, you're supposed to run the gnocchi down the back of a fork to give it ridges, but I couldn't make it work, so I gave up.
7. You can either cook or freeze the gnocchi at this point. I cooked the first 6 I made to make sure they were edible and froze the rest. If you decide to freeze, line a tray with parchment paper and put them on the tray so that they are not touching one another. Once they're frozen solid you can put them in a bag. I had some for dinner from the freezer tonight, they didn't suffer too much.
8. Prepare the sauce. Put the oil in a frying pan and flash fry the sage leaves. Gourmet says put the oil in a skillet and add the leaves once the oil starts to "shimmer." I'm not sure what that means - I waited for it to get hot and then put them in for just about 30 seconds each. Take out the leaves and fry the chestnuts in the same oil until they are golden and crisp (about 30 seconds). Gourmet says to do the sage and chestnuts in batches. Drain the nuts on a paper towel. Add the butter (and 1/2 tsp. salt says Gourmet) to the pan with the oil and cook it until golden brown.
9. Cook the gnocchi. Add half of the gnocchi to a pot of well salted boiling water and stir. Cook until they float to the surface (about 3 minutes). Transfer with a slotted spoon to the skillet with the butter sauce, coating them in the sauce over medium heat.
10. Serve with the nuts, sage, and Parmesan on top.
Sunday, November 15, 2009
Fried dough = yes

I wouldn't double the recipe next time, unless there were more than two people involved, but damn, these were delicious.
I think the cinnamon sugar topping was best (the apple cider was rather tart), and yes, you do need that whole thing of Crisco. I'm sorry too.
Turkey Chili
Heat the olive oil in a large, heavy skillet over medium-high heat. Add the onion, garlic, spices/seasonings, and cook, stirring, until fragrant, about 3 minutes. Stir in the tomato paste, cook 1 minute more. Add the turkey, breaking it up with a wooden spoon, and cook until the meat loses its raw color, about 3 minutes. Add the beer and simmer until reduced by about half, about 8 minutes. Add the tomatoes and the beans; bring to a boil. Cook, uncovered, stirring occasionally, until thick, about 10 minutes. It doesn't look like much compared to KZ's masterpieces on here, but I made this for potluck #2 of 3 in a span of four days. Normally (and for the other 2) i opt for something from Trader Joes out of the box, but i decided to go for this turkey chili, mainly because i was intrigued by the recipe calling for some Mexican lager-style beer. I didn't have more than a little taste, but it was well received by the folks eating. Recipe is courtesy of the food network.
Here's how i made it:
Tuesday, November 10, 2009
Oh. My. Goodness.
 Wow. Wow. Wow. I just had the most delicious drink. I finally found a way to get over my hate of the treadmill. And I when I came back to my apartment, I had this amazing drink to quench my thirst. You could call it homemade ginger ale. You could call it green tea ginger twist, sans tea. You could call it a way to make club soda not only tolerable but also delicious. Whatever you call it, have it...Now.
(I promise, this is my next to last ginger post, and then I'll give it a rest, for awhile.)
First you need to make some ginger syrup. Boil 1 cup of sugar in one cup of water, along with 2-3 tablespoons of fresh ginger. Let the syrup chill at least overnight. Pour a glass of club soda and add the ginger syrup to taste. Enjoy with a straw, like one of these cute ones HEB gave me a million years ago.
I've seen a couple of recipes for this with things like lemon grass and fresh chilli peppers. I plan to experiment with these additions.
UPDATE: Some people have asked how much syrup to a glass. For me, not too much. I added maybe a tablespoon to 12 ounces of club soda. Also, you can strain out the ginger if you don't like it floating around in your drink. I don't mind that, but I can see how others might.
Wednesday, November 4, 2009
Sometimes, Turning on the Oven Is Too Much to Ask

In addition to my work potluck, I went to another, much stranger potluck more recently. But I'd been doing a lot of cooking for DB, so I the thought of making something complicated was more than I could handle. Instead, I made this salad, which I believe HEB inspired from her favorite at Cosi. It's not hard, it's not complicated, but it took nice pictures and tasted good...
For the dressing:
- one part balsamic vinegar
- one part olive oil
(I start with 1/4 cup each of oil and vinegar and then decide if I have enough dressing for the amount of salad I have.)
- 1 teaspoon of mustard
- 1 teaspoon garlic
- pinch of salt
Someone once told me that if you slowly drizzle the oil into the vinegar as you're wisking it will separate less, so I do that. Not sure if it actually works. For the salad
- Mixed greens
- Colored Peppers
- Carrots
- Cashews and pistachio nuts
- Grapes
- Craisins
- Blue Cheese
Saturday, October 31, 2009
Make This For Your Next Potluck
 A while ago I went to a work potluck. I wanted to make something delicious (and mildly impressive), but by the time the list came to me, many people had already signed up for dishes in the other genres I had considered. So after much anxiety and numerous suggestions, I decided on this rice. I have had this recipe for years, but I never make it because it has a lot of ingredients that I never had and never felt like buying. But, this time I took a look at my spices and realized I was pretty much set to go with this. And, once you have all the ingredients, it's pretty easy.
 And, this rice is so delicious. Like this and this, it might be the butter. Also, I did not cook this rice in the pot in the picture, but I did serve it in that dish because it's so pretty. I think you could make this rice in the oven in a dutch-oven-like pot. The chicken would probably even taste better if you did.
Recipe adapted from and Zubin Mehta (Bon Appetit)
Ingredients:
- 1 stick butter
- 4 medium onions, chopped
- 1 tablespoon minced ginger
- 2 cups (basmatti) rice
- 4 cups of stock
- 2 large (or more) chicken breasts, cut into bite sized pieces. You can skip the chicken, add in cubed (pan fried) tofu, or skip it all together. When my parents used to make this they served it as a side, and I always thought the chicken was sort of pointless. However, if you want it as a main dish, I think adding chicken (or tofu) definitely improves it.
(Spices)
- 16 whole cloves
- 4 cinnamon sticks
- 2 teaspoons turmeric
- 2 teaspoons cumin seeds
- 1 1/2 teaspoon ground nutmeg
- 1 1/2 teaspoon ground mace
- 3/4 teaspoon cardamom seeds
- 3/4 teaspoon cayenne
- 1 teaspoon salt
- 1 1/2 teaspoon saffron threads
- 1 teaspoon sugar
(Other Stuff)
- 3/4 cups dark raisins, plumped in water
- 3/4 cups yellow raisins, plumped in water
- 1/2 cup unsalted raw cashews
- 1/2 cup shelled pistachios
- 1/2 cup slivered almonds
- One more onion cut into strips and fried until they're crispy (for garnish, if you want)
Note about substituting tofu: If you do this (which I think would be equally delicious) you should pan fry it first, and add it to the mix later in the cooking process, so that it doesn't fall apart.
Note about the spices: The only downside (that I can think of) to this recipe is that it involves numerous spices and can therefore require a sort of heavy investment in spices at the outset. I skipped the cloves because I didn't have any, and I used ground cumin instead of cumin seed for the same reason. It all worked out just fine.
Instructions:
- Melt butter in large pot (like one you'd use to make soup)
- Saute the onions and garlic, then add ginger
- Add the broth and bring to a boil
- Add the rice and spices. Lower heat, stir and simmer for about 5 minutes.
- Add the chicken. Cover and cook on medium heat for 40 minutes, or until all of the liquid is absorbed. I found I needed more broth than the recipe called for because all the liquid was absorbed but the rice was not soft yet. If this happens, just add a little more broth (or water if you don't have more broth).
- While the rice is cooking, in a skillet, roast all of the nuts and soak all of the raisins.
- Once all the liquid is absorbed in the rice, add in the nuts and (drained) raisins. Stir and cook for an additional five minutes.
- Serve. The recipe says it serves 8. I think, as a side, it serves several more than that.
Tuesday, October 27, 2009
Because It's Always Somethin' Somethin' Weather

This cranberry slushy can barely be classified as a recipe, but it is probably my first (and favorite) exposure to alcohol. My aunt always made this at Thanksgiving and now it is a staple in my freezer, for parties and for weekday nights.
All you need is (1) one can of frozen lemonade, (2) one bottle of standard sized cranberry juice, and (3) the frozen lemonade can full of rum (1.5 if you're really feeling feisty).
Stir it up, and put it in the freezer. The next day you'll have a frozen treat. The alcohol keeps it from freezing solid, so once you stir it up, you're good to go.
Wednesday, October 21, 2009
Mini Quiche Are Maybe Worth It

For the recent David Berkeley house concert, I made mini quiche. During the baking process I basically decided there was no way I was going to post this recipe because they were sort of a hassle. But today one of my coworkers told me she "must have eaten a dozen of them." And, to my surprise, they were the most heavily consumed item at the event (this is particularly shocking since these were also available). So since they were pretty popular, and since I imagine they will be much less of a hassle now that the kinks are basically worked out, here is the path to mini-quiche heaven.
Before you try to repeat this at home, a few warnings are prudent. First, other than the crust, I made this up as I went along. Second, I had a number of debates with my sou chef (who has much more experience eating quiche than I but much less experience in the kitchen) regarding the proper way to make sure each mini had the proper mix of ingredients. Third, the sou also raised his eyebrows at my use of skim milk and at the fact that the cheese to spinach ratio was sort of low. He also forbade the use of pepper and salt, which ultimately I would have liked to have had. Finally, and perhaps most significantly, you need an obscene amount of PAM to get these buggers out of the pan.
What follows is mostly approximation, except for the crust, which I followed to the letter. I will also add that I only own one mini-cupcake pan. This process would have been much less painful with 2, just in case you're thinking of trying this at home.
Crust Ingredients
This is Julia Child’s all-purpose best quality French pastry dough, provided to me by EW. The quantities listed here are for a single recipe, which I actually doubled to accomodate the amount of filling I made. I left it as is (instead of doing the math for you) because I do not think you can double this recipe. You just have to make it twice. Your food processor will die otherwise. Plus, if you want to make a plain ole quiche (as opposed to mini ones), one portion of this is more than enough.
- 1 ¾ cups flour
- 1 tsp salt
- 1 ¼ sticks chilled butter
- 1/3 to ½ cups ice water
Crust Instructions
1. Place salt and flour into mixer and blend for a few seconds. Cut chilled butter into quarters and drop into mixer. Turn on for three seconds.
2. Add all but two tablespoons of the ice water and turn on the machine. In 2-3 seconds, the dough has just begun to mass on the blade and the pastry is done.
3. Take the dough out and put it on a lightly floured surface. Make yourself, 48 (or 96) little balls, being careful not to over handle the dough.
4. Make each ball into a disk and press it into the bottom of your mini-cupcake pan that you have HEAVILY sprayed with cooking spray (and not the kind with flour either).
5. Press the dough to form little cups. Do your best to get the dough all the way to the top of the pan (sou was right on about this).
6. Stab the bottom of each little quiche crust with a fork to get any air bubbles out.
7. Pre bake the crust at 350. You will see in the picture, I wasnt particularly precise about the baking time. I think 5 minutes is plenty, but I did forget about one batch and left it for closer to 10 and the result was not tragic.
Filling Ingredients
- 1 or 2 tablespoons of olive oil
- one box of fresh spinach. I think this is about a pound. It was one of those boxes that you would buy for a week's worth of salad before you ended up throwing half of it away because you cant eat spinach salad every day.
- 3 cloves of garlic
- 3 large yellow onions
- 1 cup milk
- 6 eggs
- 1/2 cup gruyere
- 1/2 cup fontina
- salt and pepper to taste
Filling Instructions
1. Saute the Spinach and garlic with just a little olive oil so that it doesnt stick to the pan. I did this in batches because the pan I started to use was too small for the quantity of spinach, no more than five minutes per batch. Take the spinach out of the pan and set aside.
2. Put the onions in a food processor. Chop them up. Put them in the pan them in the same pan you used for the spinach and saute them too, about 10 minutes. Mine were too liquidy to really brown properly, but they still tasted good.
3. While the onions are cooking, put the spinach in the food processor and grind it up.
4. Put the cooked spinach and onion in a large bowl. Add milk and eggs. The sou thought it looked too liquidy, and he may have been right, but in the end it worked out fine. If you would like it firmer, I saw recipes that did crazy things like add flour or use cream instead of skim milk. The biggest lesson I learned from this process is that it doesn't really matter as long as you think the filling will taste good.
5. Stir all these ingredients together. Add salt and pepper to taste. Sou would not allow this, and since he was being so kind and helpful, I went along. Next time, I will add probably 1/2 teaspoon each (at least) to this mix.
6. Grind up your mix of gruyere and fontina (hey, that food processor really has to earn its keep after I dragged it to New York and back). Keep the cheese separate from the spinach/onion mixture. Put them in the refrigerator until your crust is ready.
Assembly
1. Once you have pre-baked the crusts, fill each with the spinach mixture almost to the top. Then sprinkle a healthy portion of the cheese.
2. Bake at 350 for about 15-20 minutes.
3. Pry them out of the pan and serve them to your friends, who will be wildly impressed that they didn't come from Costco. (I found that a butter knife worked pretty well for the quiche removal process.)
Monday, October 19, 2009
Resurgence of a Classic Cookie?

As we all know, Deb is perhaps our greatest source of inspiration. Many among us seem tempted to just make whatever she says. So, lacking creativity of my own, I pondered her snickerdoodle recipe. I had all but decided against it when, to my shock, I got almost the exact same recipe in an email from Saveur.
Partially because I dont want any more of my cooking magazines to go out of business and partially because I dont want to be too reliant on one source of inspiration, I went with Saveur's version. They are seriously pretty much identical, but maybe one day I'll do a taste test to see which one I like more. Yes, I'll do that as soon as I have a need for 96 snickerdoodle cookies in my life.
One thing I will say about this cookie that I had pretty much forgotten about from childhood, it is delicious. I love cinnamon. I love sugar. And this is one occasion where I won't complain about the butter.
Saturday, October 17, 2009
Ginger Pear Sorbet

As we've mentioned before, sorbet making is easy and the results are delicious. Recently I bought a pint of pears at the Farmer's Market, to make another dessert. But then I got to making things for an upcoming party, and decided I could not justify making a pie for 10-12 people if I would not be able to serve it at said event. So, I axed the other dessert. But then I had a pint of pears going bad in my apartment. What to do?? Make sorbet!
And, I also had a bunch of fresh ginger in my apartment from a number of only mildly successful attempts to replicate Argo Tea's Iced Green Tea Ginger Twist, so we (I had a visitor's help) decided to add the ginger to the pear.
The result, a delicious frozen treat.
Ingredients
- 1 pint of peeled pears
- 1 cup water
- 1 cup sugar
- about 3 tablespoons of minced ginger.
Instructions
- Boil the sugar, water, and 2 tablespoons of the ginger until the sugar is complete dissolved. Let cool. (Our original recipe says to let the syrup chill, but I don't think that's necessary, as long as it's not burning hot when you add it).
- Puree the pears
- Add the syrup to the pears, puree some more.
- Add the last table spoon of fresh ginger
- Freeze until hard, then take it out and puree it again.
Thursday, October 8, 2009
Peach Kuchen
 This post may be too little too late because peaches are no longer in season, but I wanted to post my family's lovely alternative to peach pie. This recipe comes from my great aunt, and kuchen is German. But, I don't think this qualifies a legit kuchen. Instead, I tend to think of it as a custard, at least when I bake it much longer than my mom does (she likes it runny, I like it firm).
I almost convinced CH to eat it (even though it involves cooked fruit), and apparently I know more than one crazy person who does not like peaches who also refused to try it. But, I maintain, this "pie" is delicious.
Crust Ingredients:
- 1 1/4 cup flour
- 1/2 tsp. salt
- 1/2 cup unsalted butter
- 2 tbs. sour cream
Filling Ingredients:
- 1 quart fresh sliced peaches
- 3 egg yolks
- 1/3 cup sour cream
- 1 cup sugar
- 1/4 tsp. salt
- 1/4 cup flour
Crust Instructions:
1. Combine all the crust ingredients in the bowl of a food processor and pulse until it forms coarse crumbs (like corn meal).
2. Press into a 10 inch spring form pan. Crust should go onto the sides of the spring form.
3. Bake at 375 until golden brown, about 15 minutes (don't over cook, it's going back in the oven again later).
Filling Instructions:
1. Combine all the ingredients together. You can make more filling if you want a deeper dessert. If it seems to runny, add a little more flour or more peaches.
2. Bake at 375. My mom bakes for 35 minutes. I bake for almost an hour. It's done when you take it out and you can shake it and the filling stands up.
Wednesday, October 7, 2009
Not Even Remotely About Recipes
Okay, so my job rarely has anything to do with cooking or recipes. And most days, it has nothing at all to do with food. But today I came across this quote in a case I read for a project I'm working on. It's...sort of about food? Sometimes federal judges (and their clerks) do have a sense of humor.
Here's the quote:
"We start with some threshold questions about the scope of Volovsek's suit. Unfortunately we have to spend considerable time addressing this issue because the parties appear to have simply collected the sum total of all the unpleasant events in Volovsek's work history since 1991, dumped them into the legal mixing bowl of this lawsuit, set the Title VII-blender to puree and poured the resulting blob on the court."
Volovsek v. Wisconsin Dept. of Agr., Trade and Consumer Protection, 344 F.3d 680 (7th Cir. 2003)
Tuesday, October 6, 2009
Brownies are Better with a Little Cheese

In just over a week, I am hosting a concert for David Berkeley. Hopefully, it will be a fun-filled evening with music and delicious food. But, since the concert is going to be on a weekday, I must plan ahead. And since Deb recently describe a reason why she too had a need to cook in advance, I decided to try her apparently delicious recipe for cheesecake brownies.
Or, at least I planned to follow her recipe. But once again, I concluded that Deb uses too much butter. So, I shopped around for some other recipes and made some modifications. Even with 25% less butter and reduced fat cream cheese, the end product is delicious. (Probably because it still has enough fat to cause a coronary.)
When I looked at the brownie recipe on Smitten Kitchen, I decided (1) I needed to double the recipe and (2) that would require 2 sticks of butter, which is outrageous. I also noticed that my mom's brownie recipe called for basically the same ingredients. Turns out, the exact same ingredients in nearly the same proportions.
So, I followed my mom's brownie instructions and then topped it with a double dose of Deb's cream cheese topping. I had one package of regular fat cream cheese and one package of 1/3 fat, so that's what I used, and it was delicious. I also decided to skip the chocolate chips - seemed like overkill.
Deb's freezing-then-cutting tip was key, and something I think I'll do from now on with brownies (even though I have recently made disparaging remarks about putting a whole slab of brownies in the freezer). I cut them into bite sized brownies so that people can have more, and so that more people can have some.
Here are the brownie ingredients:
- 6 oz. Unsweetened chocolate
- 1 1/2 sticks butter
- 6 eggs
- 2 3/4 cups sugar
- 1 teaspoon salt
- 1 tablespoon vanilla extract
- 1 1/2 cups flour
After that, I followed SK pretty much to the letter. Hopefully they'll be a hit. Now I just need some more ideas for things to make!
Monday, September 14, 2009
The Best Apple Pie Yet
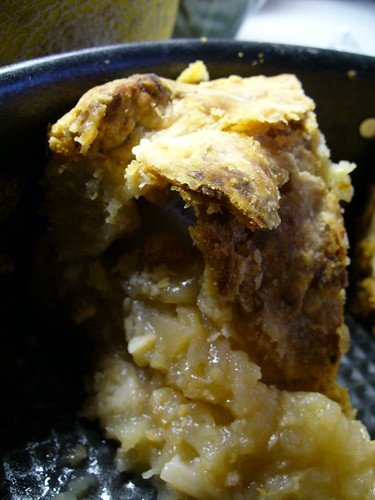
My friend Jenny and I got a little obsessed with Pushing Daises over our last semester of school. Now that we are free of that time suck, we've devoted ourselves to making pies. The real goal in all this has been to recreate the apple pie that Chuck sends to her aunts. A cheese is always involved, since Chuck's aunts love cheese. We tried the cheese grated on top version, which, while delicious, did not see up to the PieMaker's standards. We also branched out to non-apple pies (because seriously, it's just as easy to bake one as two). Most recently, this effort turned out the almond, pear tart.
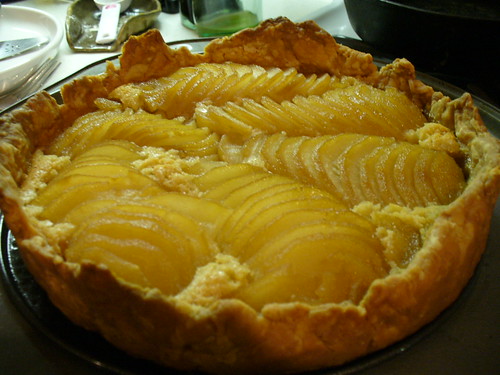
(Earlier (and picture-less) was a creme fraiche peach pie that was AMAZING.)
However, the crowning glory of the weekend was the apple pie with gruyere baked into the crust. A small amount of cheese was mixed with the flour before combining with butter and water (much to my surprise, I'm finding that a pastry blender really does do an excellent job at pie making (above the food processor!) -- leaving more substantial chunks of butter to make a more delicious baked pie crust).
The recipe, recreated here from a combination of SK's apple pie making and this blogger's cheesey instructions (I must disagree with and reject his lard-related instructions.)
Crust:
Makes one double-crusted 9-10 inch pie.
2 1/2 cups unbleached all-purpose flour
1 tsp salt
1 tbsp. sugar
20 tbsp. cold, unsalted butter
2 oz. Gruyère, grated
Icewater (get a class, put some water in, add ice. Ready your tablespoon.)
Mix flour, salt, sugar and Gruyere in a large mixing bowl. Using a pastry blender, cut in the butter until "the size of peas."
Sprinkle ice water over flour in increments of one tablespoon, toss with fork after each addition. When dough clumps together when squeezed in your palm (about 6-7 tbsp is generally the right amount), gather dough together into two disks, one slightly larger than the other, wrap in plastic wrap and refrigerate for at least two hours.
Pie:
3 lbs of apples. We used half granny smith and half mcintosh, for what I felt was a perfect level of tart+sweet.
2 lemons. (None of this one tablespoon nonsense. TART!)
6 tbls cornstarch (flour is also an option, but I really like what the cornstarch did in this version)
1/2 cup sugar
Peal and core apples, then thinly slice. Combine in a bowl with other ingredients.
Once pie dough is chilled, roll out the larger disk until it fits a 9 in pie pan (or 9 in springform cake pan, if that is all you have at hand.) Gently settle pie dough into pan (I prefer the fold into quarters method myself.) Pour apple mixture into the prepared pie pan, and roll out second disk of dough. Place on top of apples, and seal edges of pie dough together.
You can brush with egg at this point, though I never do. Place in oven pre-heated to 375F, and cook for at least 50 minutes. I like my apples mushy and my crust crisp, so I would tend to go over this time limit myself, especially if you have a more gentle oven.
Cool for about 20, if you want the pie to stay pie-like, or cut immediately and glory in the deliciousness.
Type rest of the post here
Sunday, September 13, 2009
Apparently Jack-o-lanterns are not for eating
This summer, my father decided he wanted to grow pumpkins in his garden. And, despite the in-land hurricane and all the bad weather, the pumpkins grew like weeds. When I was home last weekend for my niece's bat mitzvah, there were many rather huge pumpkins.
I decided to take one home with me and figure out something to do with it. Unfortunately, all of my internet research has indicated that jack-o-lantern pumpkins are, well, just for show. I am certain my father was unaware, or else he would have picked a different variety. Never the less, I'm making a go of it.
And so far, I have discovered at least one part of the halloween pumpkin variety tastes delicious ... the seeds.
As for the recipe, there's really nothing to it. I found that one average size halloween pumpkin gave me about 2 cups of seeds. I wanted them salty and spicy, so I coated them with just a tiny bit of olive oil plus 2 tsp of garlic powder, 1tsp of salt, and 1/2 tsp of cayenne pepper, and 1/2 tsp of red pepper flakes. I roasted them for about half an hour, stirring after half an hour. I am now resisting the urge to eat them all at once.
Sunday, September 6, 2009
this one was worth it
Cook blueberries, sugar, and zest in a 12-inch heavy skillet over medium-high heat, thoroughly crushing blueberries with a potato masher, until juices are released and sugar has dissolved, about 2 minutes. Stir together lemon juice and cornstarch, then stir into blueberry mixture. Boil, stirring, 1 minute (mixture will thicken). Transfer blueberry compote to a bowl and chill until cold, about 1 hour. Discard lemon zest. Sandwich layers: Whisk together flours, baking powder, baking soda, and salt in a small bowl. Beat together butter and brown sugar in another bowl with an electric mixer at medium-high speed until pale and fluffy, about 3 minutes. Beat in egg and vanilla. At low speed, add flour mixture in 2 batches, mixing until just combined. Divide batter between baking pans and spread into thin, even layers with offset spatula. Bake until golden-brown but still tender, 10 to 12 minutes. Cool completely in pans, about 30 minutes. Assemble sandwiches: Transfer sandwich to a cutting board using overhang.  Blueberry Swirl Ice Cream Sandwiches
I fell in love with the idea of these sandwiches, which were on the cover of Gourmet's August 2009 issue. However, I also pretty much simultaneously fell in love with a batch of KZ's homemade graham crackers that she made while visiting, so I decided to tweak the recipe to accommodate the graham-love.
The sandwich layers turned out a little odd, much more caramelized than I anticipated. However, all-in-all, I'm pretty pleased with these. If I make them again, I will probably stick with the lemon ice cream as in the original, since I think the tartness would be extra delicious.
Here's the recipe with my mods:
For ice cream:
For blueberry compote:
For sandwich layers:
Equipment: 2 (8-inch) square baking pans (2 inches deep); a small offset spatula
Blueberry compote:
Preheat oven to 375°F with rack in middle. Butter baking pans and line with parchment paper, leaving a 1-inch overhang on each side, then butter parchment paper. 
Dollop tablespoons of blueberry compote all over ice cream, then swirl it gently through ice cream with a spoon.  Spoon all of ice cream over 1 sandwich layer (in pan) and spread evenly using clean offset spatula.
  Invert second sandwich layer over ice cream, pressing gently to form an even sandwich. Wrap baking pan in plastic wrap and freeze until firm, at least 2 hours.
  Cut into 12 pieces. (Eat with a fork because the sandwich layers are super sticky.)