Monday, September 14, 2009

The Best Apple Pie Yet


My friend Jenny and I got a little obsessed with Pushing Daises over our last semester of school. Now that we are free of that time suck, we've devoted ourselves to making pies. The real goal in all this has been to recreate the apple pie that Chuck sends to her aunts. A cheese is always involved, since Chuck's aunts love cheese. We tried the cheese grated on top version, which, while delicious, did not see up to the PieMaker's standards. We also branched out to non-apple pies (because seriously, it's just as easy to bake one as two). Most recently, this effort turned out the almond, pear tart.


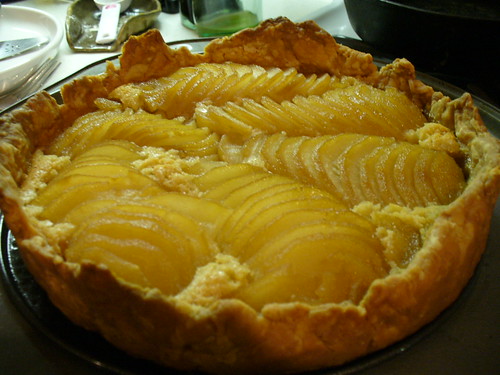
(Earlier (and picture-less) was a creme fraiche peach pie that was AMAZING.)

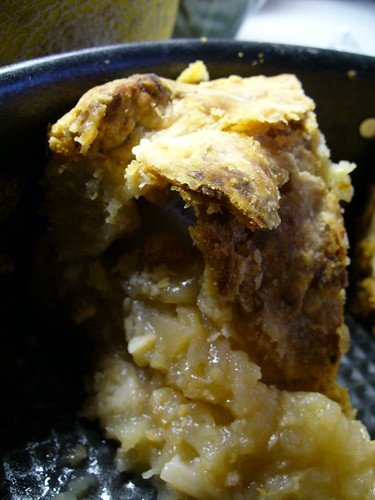
However, the crowning glory of the weekend was the apple pie with gruyere baked into the crust. A small amount of cheese was mixed with the flour before combining with butter and water (much to my surprise, I'm finding that a pastry blender really does do an excellent job at pie making (above the food processor!) -- leaving more substantial chunks of butter to make a more delicious baked pie crust).

The recipe, recreated here from a combination of SK's apple pie making and this blogger's cheesey instructions (I must disagree with and reject his lard-related instructions.)


Crust:
Makes one double-crusted 9-10 inch pie.
2 1/2 cups unbleached all-purpose flour
1 tsp salt
1 tbsp. sugar
20 tbsp. cold, unsalted butter
2 oz. Gruyère, grated
Icewater (get a class, put some water in, add ice. Ready your tablespoon.)

Mix flour, salt, sugar and Gruyere in a large mixing bowl. Using a pastry blender, cut in the butter until "the size of peas."

Sprinkle ice water over flour in increments of one tablespoon, toss with fork after each addition. When dough clumps together when squeezed in your palm (about 6-7 tbsp is generally the right amount), gather dough together into two disks, one slightly larger than the other, wrap in plastic wrap and refrigerate for at least two hours.

Pie:
3 lbs of apples. We used half granny smith and half mcintosh, for what I felt was a perfect level of tart+sweet.
2 lemons. (None of this one tablespoon nonsense. TART!)
6 tbls cornstarch (flour is also an option, but I really like what the cornstarch did in this version)
1/2 cup sugar

Peal and core apples, then thinly slice. Combine in a bowl with other ingredients.

Once pie dough is chilled, roll out the larger disk until it fits a 9 in pie pan (or 9 in springform cake pan, if that is all you have at hand.) Gently settle pie dough into pan (I prefer the fold into quarters method myself.) Pour apple mixture into the prepared pie pan, and roll out second disk of dough. Place on top of apples, and seal edges of pie dough together.

You can brush with egg at this point, though I never do. Place in oven pre-heated to 375F, and cook for at least 50 minutes. I like my apples mushy and my crust crisp, so I would tend to go over this time limit myself, especially if you have a more gentle oven.

Cool for about 20, if you want the pie to stay pie-like, or cut immediately and glory in the deliciousness.
Type rest of the post here

Read More...

Sunday, September 13, 2009

Apparently Jack-o-lanterns are not for eating

This summer, my father decided he wanted to grow pumpkins in his garden. And, despite the in-land hurricane and all the bad weather, the pumpkins grew like weeds. When I was home last weekend for my niece's bat mitzvah, there were many rather huge pumpkins.

I decided to take one home with me and figure out something to do with it. Unfortunately, all of my internet research has indicated that jack-o-lantern pumpkins are, well, just for show. I am certain my father was unaware, or else he would have picked a different variety. Never the less, I'm making a go of it.

And so far, I have discovered at least one part of the halloween pumpkin variety tastes delicious ... the seeds.


As for the recipe, there's really nothing to it. I found that one average size halloween pumpkin gave me about 2 cups of seeds. I wanted them salty and spicy, so I coated them with just a tiny bit of olive oil plus 2 tsp of garlic powder, 1tsp of salt, and 1/2 tsp of cayenne pepper, and 1/2 tsp of red pepper flakes. I roasted them for about half an hour, stirring after half an hour. I am now resisting the urge to eat them all at once.

Read More...

Sunday, September 6, 2009

this one was worth it

Blueberry Swirl Ice Cream Sandwiches

I fell in love with the idea of these sandwiches, which were on the cover of Gourmet's August 2009 issue. However, I also pretty much simultaneously fell in love with a batch of KZ's homemade graham crackers that she made while visiting, so I decided to tweak the recipe to accommodate the graham-love.

The sandwich layers turned out a little odd, much more caramelized than I anticipated. However, all-in-all, I'm pretty pleased with these. If I make them again, I will probably stick with the lemon ice cream as in the original, since I think the tartness would be extra delicious.

Here's the recipe with my mods:

For ice cream:

  • 2 pints vanilla ice cream
  • Blueberry compote
For blueberry compote:
  • 2 cups blueberries (10 ounces)
  • 1/4 cup sugar
  • 2 (3-by 2 1/2-inch) strips lemon zest
  • 1 tablespoon fresh lemon juice
  • 2 teaspoons cornstarch
For sandwich layers:
  • 1/3 cup all-purpose flour
  • 2/3 cup graham flour
  • 1/2 teaspoon baking powder
  • 1/4 teaspoon baking soda
  • 1/4 teaspoon salt
  • 1/4 teaspoon cinnamon
  • 1 stick unsalted butter, softened
  • 3/4 cup packed light brown sugar
  • 1 large egg
  • 1/2 teaspoon pure vanilla extract
Equipment: 2 (8-inch) square baking pans (2 inches deep); a small offset spatula

Blueberry compote:

Cook blueberries, sugar, and zest in a 12-inch heavy skillet over medium-high heat, thoroughly crushing blueberries with a potato masher, until juices are released and sugar has dissolved, about 2 minutes.

Stir together lemon juice and cornstarch, then stir into blueberry mixture. Boil, stirring, 1 minute (mixture will thicken).

Transfer blueberry compote to a bowl and chill until cold, about 1 hour. Discard lemon zest.

Sandwich layers:
Preheat oven to 375°F with rack in middle. Butter baking pans and line with parchment paper, leaving a 1-inch overhang on each side, then butter parchment paper.

Whisk together flours, baking powder, baking soda, and salt in a small bowl. Beat together butter and brown sugar in another bowl with an electric mixer at medium-high speed until pale and fluffy, about 3 minutes. Beat in egg and vanilla. At low speed, add flour mixture in 2 batches, mixing until just combined.

Divide batter between baking pans and spread into thin, even layers with offset spatula. Bake until golden-brown but still tender, 10 to 12 minutes. Cool completely in pans, about 30 minutes.

Assemble sandwiches:
Dollop tablespoons of blueberry compote all over ice cream, then swirl it gently through ice cream with a spoon. Spoon all of ice cream over 1 sandwich layer (in pan) and spread evenly using clean offset spatula. Invert second sandwich layer over ice cream, pressing gently to form an even sandwich. Wrap baking pan in plastic wrap and freeze until firm, at least 2 hours.

Transfer sandwich to a cutting board using overhang. Cut into 12 pieces. (Eat with a fork because the sandwich layers are super sticky.)

Read More...

Saturday, September 5, 2009

next time, I will spend the $7

Every once in a while, I get a really strong craving for homemade pasta. Luckily, it's usually intense but brief and passes by the time I've convinced myself that I cannot spend $7 on pasta and have walked away the fresh pasta in the grocery store. But, last week, I was subject to a much more durable version of this craving, the likes of which I hadn't experienced since circa 2003 in Cape Town without good access to a kitchen so I couldn't make up my own pasta. Anyway, I now do have access to a lovely kitchen and have recently been very appreciative of what happens when you hand-make things that you would usually buy in a box at the grocery store (or a bag in the grocery store). So I thought I'd give homemade pasta a try, and save the $7. Add to that the recent drool-worthy interpretations of Smitten Kitchen recipes, and I knew where I'd be searching for my homemade pasta recipe.

Well, it seemed like a good idea at the time.

Not having a pasta maker, the hand-shaped orecchiette seemed like a perfect option. SK actually links to the orecchiette recipe at Delicious Days, which sure *looked* easy. I couldn't find 00 flour, so I purchased the durum flour that DD had rejected. Maybe that was my first mistake. Because no matter how much I kneaded 2 c. durum flour, 2 eggs and salt, it would not form a dough. I finally gave in and added another egg. And then another egg. And then some water. And then it formed a dough. (Oh, and also, the durum flour cost $5.29, so there goes my rationale for not just buying fresh pasta in the first place.)

Discouraged by that experience, I decided to make another version of the dough using all-purpose flour. (I knew that it had too much gluten, but didn't have anything else to try.) That dough only required 1 extra egg to form up properly. Having spent way too long kneading dough for one night, I dumped it in the fridge and ate toast with chevre for dinner.

Rejuvenated the next day, I let the dough come to room temperature while making the sauce. I stole SK's idea of using shallots, but beefed up the sauce with some zucchini and yellow squash. I sauted chopped shallots and garlic in olive oil, and then added the chopped squash. While it cooked, I chopped three heirloom tomatoes and tossed them in a baking dish. I added the squash saute, salt and pepper and cooked everything at 450 degrees for about 20 minutes, tossing once.
It was by far the most successful part of this pasta-making adventure.

I'm willing to admit that part of my frustration in shaping the pasta may have had to do with the fact that I did so while on the phone. Since I couldn't find my earpiece and my phone is breaking at the hinge, it requires a very particular angle of my neck to hold it between my ear and my shoulder. This may have added to my tension while shaping the pasta. Anyway, I started as instructed. And even made it through shaping about 1/4 of the durum dough and 1/8 of the all-purpose dough before my neck hurt too much to continue. The durum dough was much tougher than the all-purpose dough, even with the extra eggs and water, so it was more difficult to shape. However, the pasta turned out cuter. I laid the shaped pasta out to dry (durum on the left; all-purpose on the right).


By this point, I really wanted to eat homemade pasta. So I took the other 1/8 of the all-purpose dough and rolled it out as thin as I could manage. Then I cut it into unintentional trapezoids.I ignored the requisite overnight drying time and popped it into a pot of boiling water. It was pretty much exactly what I wanted out of homemade pasta.

Over the following two nights, I cooked the actual orecchiette, durum version first. As SK mentions, they took forever to cook. (I think the durum version clocked in at 24 minutes, while the all-purpose clocked in at 18. I'm also not sure that the durum ones were actually fully cooked when I ate them.) Both were delicious; however, they will not be added to the category of food that takes 7 hours to make and is worth it. (The trapezoids might have been worth it, since they didn't take quite as long to make as the orecchiette.)
Will there be homemade pasta in my future? Perhaps. Under the following circumstances:
1/ I figure out how to buy 00 flour, since I think that would have eased some of my problems, and I purchase a pasta maker so I can roll out thin sheets very easily; or
2/ I decide not to throw out the 1 1/2 batch of pasta dough that is currently in my freezer and roll it into thin sheets to be cut into trapezoids; or
3/ I buy the $7 fresh pasta at Whole Foods.

At the moment, I am leaning towards #3.

Read More...