Showing posts with label dessert. Show all posts

Saturday, January 22, 2011

The Thing About Friendship (Bread)

[Photo credit: Joel Straus]

Is that it can be a lot of work. In early November I got this email from a friend:

"Would you be interested in getting a starter for this Amish Friendship bread that I'm making tonight? I'll have a batch of starters to give away starting tomorrow, and it's really tasty and easy (instructions come with), so let me know."

Sounded easy enough and like a fun adventure, so I thought what the heck, and I took a bag of yeast. I did not really know what I was getting myself into. You have to "mush" this bag every day for 10 days and then on day 6 you have to add some stuff to feed the yeast. And then on day 10 when it's time to bake, you have enough to bake a whole cake (that's the other thing, this "bread" is really cake) PLUS 4 starters to give away (or 3 to gift 1 to keep).

The first round of starters I gave away all died because my friends did not care for them. (I'm hoping the inability of my friends to care for friendship bread is not an actual reflection on any of our friendships.) And in the second round I think only 1 starter got the treatment it required.

After 3 rounds, this friendship-bread thing was starting to stress me out. So at the end of the last cycle, I cooked all of them (except one starter that I froze for a later experiment), looking for as many variations as I could find. And this week I pulled out a frozen carrot cake from my freezer, frosted it (while it was still frozen, for the record), and served it at a little gathering. It was so good it almost made me miss having the secret ingredient constantly growing on my counter.

Anyway, I feel a little bad sharing this recipe because you cant make it without the yeast, but since this appears to be somewhat common I'll share my variations and assume that one day you all will find yourselves with the veritable baking chain letter that is Amish Friendship Bread. Although, I guess there are recipes on the web to make the starter, so it's not really that much of a secret.


Here are some "Important notes" that came with the bread.
1. The bread starter will come in a gallon size bag. This works well because it gives you enough space to add the ingredients later on.
2. Do not use any metal bowls, pans, or spoons when mixing (but you can bake it in a metal container).
3. Do not refrigerate the yeast.
4. The yeast will make a bunch of air bubbles in the bag, especially after you've done your mid-cycle additions. Make sure to let them out, or the bag will explode.

And, here's what to do for the 10-day cycle.
Days 1 - 5: "Mush the bag." I don't really know what this means. I generally squished it around in my hands for a minute or so.

Day 6: Add 1 cup flour, 1 cup sugar, and 1 cup milk to the bag and mush it together. Don't refrigerate, even though there's milk in there. It will be okay, I promise.

Days 7 - 9: Mush the bag. Same as days 1-5 but it will grow more since you just fed it, so make sure to let the air out.

Day 10: Bake your bread and make your starters by following the instructions below.

Instructions:
1. Pour the entire contents of the bag into a non metal bowl, and using a wooden spoon, add 1.5 cup flour, 1.5 cup sugar, and 1.5 cup milk and mix well. Note: a lot of the recipes I see on the web say to add only 1 cup each of these things. I always did it according to these rules and in the end I always had around 5 1/2 cups of yeast at the end, so 4, 1-cup starters and 1 1/2 to make the bread. This seems wrong because most of the recipes online only call for 1 cup of starter, but I'm not going to question it because it worked well each time. That said, I wouldn't call the whole process exactly scientific, so I wouldn't fret too much about it.

2. Make your starters to gift away or keep for yourself for another cycle by adding 1 cup of the mixture to 4 separate gallon-sized ziplock bags. Make sure you write when Day 1 is on the bag.

3. Preheat the oven to 325.

4. Make your batter by adding stuff to what's left in the bowl. Add:

3 eggs
1 cup oil (or 1/2 cup oil, 1/2 cup applesauce)
1 cup sugar
2 tsp. cinnamon
1 tsp. vanilla
1 1/2 tsp. baking powder
1/2 tsp. baking soda
1/2 tsp. salt
2 cups flour
1 large box of instant vanilla pudding

5. Grease your dish. This is enough for two loaves or 1 bundt pan. Then dust the bottom of the pan with a cinnamon sugar mix (like you would with flour to keep something from sticking to the pan). Bake for 40 minutes in a loaf or 1 hour in a bundt. These baking times are really approximate. I found that all the bundt variations took a little longer. Start checking at 40 minutes. It's done when a knife comes out clean.

And finally, some variations:
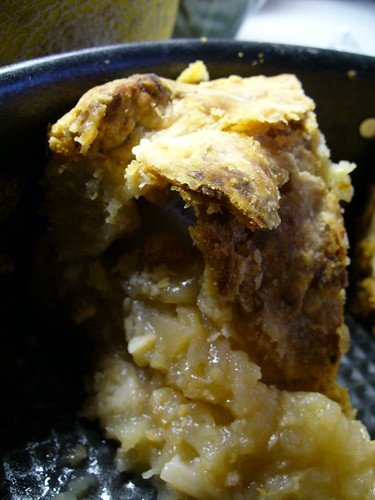
1. The first variation I made was pumpkin (pictured above). Instead of 1 cup of oil I used half a cup, and then I added 3/4 cup of canned pumpkin. I also substituted the cinnamon with 2-3 teaspoons of Penzy's pumpkin-pie spice. I started with only 2 and then added more until I found that the batter tasted sufficiently spicy. The glaze is a classic cream-cheese frosting, thinned with warm milk so that it could be drizzled like a glaze.

2. The second variation I made was banana. Instead of 1 cup of oil I used half a cup and 3-4 mashed bananas. I think I just used how ever many I had in the freezer. It was really good. Up there with banana cake.

3. And then I made biscuits. They were terrible. Okay, not terrible, but my immediate response to them was "I would not serve them to my friends and admit that I made them." So, I will spare you that recipe. Suffice to say, if you ever find yourself with friendship bread and are looking around on the web for variations, don't trust ones that say they will make biscuits.

4. And finally, carrot cake. Reduce oil to 1/2 cup and add 3 cups of grated carrots. Because I still have it, I used 1 teaspoon of pumpkin pie spice in addition to the 2 teaspoons of cinnamon. Also, I made the carrot cake in two 9 inch silicon pans and frosted them with cream cheese frosting. Man, it was good. For the cream-cheese frosting: (1) 8 ounces cream cheese, (2) 4 tablespoons butter, (3) 1 teaspoon of vanilla, and (5) sifted powder sugar. I started with 4 cups and then added a little more until I was happy with the texture.
Type the rest here

Read More...

Sunday, July 11, 2010

A Killer Chocolate Cookie

I have had a couple of dinner parties this summer. And one common theme in the foods that I have offered has been these amazing chocolate cookies.

The first time, I made them to look like this:


(Those are ice cream sandwiches, one with vanilla and the other with homemade strawberry sorbet. I thought these were really good, even better after they'd been in the freezer for a day.)

And the second time, I did just what Deb told me to do and made these:

Pretty much all critics agree that these are delicious chocolate cookies. They're very sweet, and they spread a lot in the baking process, but in all they are the star of this show. As for the oreo filling, I and most people agree that it tastes pretty much like the original "white stuff" though at least one taste tester agreed with Deb's assessment that, when combined with the cookie, the overall package was too sweet. Deb says, lower the sugar if you're using the cookie to make oreos. I'm not sure that's the route I'd take, but I am not afraid of a sugary cookie. Moral of the story, less sugar or no, this is a great versatile chocolate wafer cookie that is easy to make and sure to please.

Read More...

Sunday, May 30, 2010

raw rhubarb does freeze well!

I'd bought some rhubarb at the beginning of the month but didn't have time to make anything out of it. Ms. CAM kindly cut it up and put it in my freezer, awaiting a three-day weekend (and didn't even mention that most hostesses don't ask their guests to prep and freeze food for later consumption). In between then and today, Smitten posted rustic rhubarb tarts. So, thanks to both CAM and Smitten, I've enjoyed two today and am trying to stop myself from enjoying my third. Not that I've ever been picky about my rhubarb, but this recipe is definitely a winner.

I followed the by-hand directions, because I also dragged Ms. CAM around central Connecticut trying to track down a pastry blender (for the rhubarb pie that she never got to eat). Apparently, multiple Williams-Sonoma stores haven't been able to order pastry blenders quickly enough to meet demand. I managed to snag the last one at Macy's, though, and it was worth it. No more cutting in butter with two knives for me!

I modified the recipe a little because I didn't have corn flour and didn't feel like tracking it down just for 1 cup. And I did have about 3/4 c. graham flour and thought that its sweetness would work well with the rhubarb. I replaced all of the corn meal with graham flour and the corn flour with 3/4 c. regular flour and 1/4 c. graham flour. The crust may have turned out heavier, but I've got no complaints.

Read More...

Monday, May 10, 2010

Black Forest Biscotti

Back in the good ole days when life was simple and I lived with EW, I gave her a cookbook from Moosewood Cafe for her birthday. And, as good roommates do, she thanked me in the form of baked goods and wholesome meals. Many times. Maybe I have a selective memory for cookies and other sweet things, but I do not remember anything from that cookbook as delicious these biscotti. So, recently when I was craving sweet treats to pack in my lunch that are not completely filled with butter, I asked her for the recipe. They delivered big time. They are crunchy and sweet, but not too sweet. And since the recipe is low on butter, I didn't feel (completely) guilty when I had one every day for lunch.

Adapted from: Moosewood, via EW

Ingredients:
½ cup dried cherries
1 cup water
¼ cup butter, room temperature
¾ cup sugar
2 eggs
1 tsp almond extact
1 tsp vanilla extract
½ cup semisweet chocolate chips
2 cups + 2 tablespoons flour
1/3 cup cocoa powder (unsweetened)
½ tsp salt
1 ½ tsp baking powder

Directions:
Preheat oven to 350 F. Lightly oil a baking sheet.

In a small saucepan, heat the cherries and water just to boiling, and then remove from heat and set aside. In a bowl, cream together the butter and sugar until light and well-combined.

Blend in the eggs and almond and vanilla extracts. Fold in the chocolate chips. Drain the cherries, place them on a paper towel to absorb any extra moisture, and then stir them into the egg mixture.

In a separate bowl, sift together the flour, cocoa, salt, and baking powder. With a rubber spatula, fold in the wet ingredients until the dough is uniform and holds together when pressed lightly with floured hands.

Use the spatula and your floured hands to scoop the dough onto the oiled baking sheet. Form the dough into a 12-inch by 3 inch diameter log shape; then press down on the log, flattening it to a thickness of about an inch. The length and width should be about 14 in x 4 in.

Bake on top rack of the oven for 25-30 minutes, until dough is firm and just slightly brown.

Remove from the oven and transfer the log to a cutting board. When cool enough to handle, slice crosswise in ¾ in pieces. Lay each biscotti cut side up on the baking sheet. Bake for about 5 minutes on each side, using tongs to flip them. Cool completely on a rack and then store in an airtight container for up to 2 weeks.

Other notes:
EW says to add almonds. I would have but I didn't have any. I also forgot the chocolate chips, so I just added more cherries instead. Also, I think I probably undercooked these on the first round.

Read More...

Friday, April 16, 2010

Peanut, Peanut Butter (and Chocolate)


My favorite professor in law school frequently cautioned that things always take longer than you think they will. Such was the case with these brownies, which I planned to bring to a dinner party last Friday night. The problem was, the dinner party started at 7, and I couldn’t be bothered to read the recipe in advance. If I had, I would have known you are supposed to cool them completely before you put the chocolate on top. As it was, I was going to be late, and I had to take these brownies from the oven to my car pretty much immediately. Cooling time was not an option. So when I got to the party, they were a little bit soupy, but after an hour in the fridge, they turned out pretty good. And over the week (as I ate them in inappropriate quantities from my fridge) they tasted even better because the chocolate layer had an opportunity to properly harden.

A couple of warnings about these things:
(1) They are addicting. I came home with 2/3 of the pan from the dinner party (it was a small gathering with lots of desserts), and despite my roommate's help, I managed to consume far far far too many of these.
(2) They do not taste like peanut butter cups. I was sort of expecting something more along that line, but alas I guess we'll have to rely on Nigella's recipe for that. (Is it on this blog??)
(3) Deb says she used organic PB when she made these. I used full fat skippy. I found the PB taste to be somewhat understated. Next time, I'd make them with natural PB and a quarter teaspoon of salt or so.

Read More...

Wednesday, March 3, 2010

Empire State of Mind

These days, I miss New York. A lot. And in my misery over the last month, I started dreaming of the things I would make when it was all over. Invariably, my list was very New York. Bagels. Pizza. Cheesecake. Black & Whites. You get the idea.

When I told another former NY resident that I was going to make B&Ws because I missed New York, his basic response was, "why, they're gross?" And, as is often the case with this particular friend, he had a good point. But the thing about cravings, especially ones that are geography centered, is that even though I never actually wanted or even liked B&Ws while in NY, once I got it in my head to make them, I couldn't make the thought go away. I had to make them, even though almost every single one (of the 5 or so) I ever had (with the exception of a rare aberration from West Side Market) was stale or frosted in such a way that you couldn't actually taste the difference between the two sides. But these red flags would not be an impediment to my determination, and so I took the plunge and made them.

Given everything I've said up to this point about how black and whites usually taste mediocre to me, it should be no surprise that the ones I myself made were no exception to this rule. I knew they were off the moment I took the first batch out of the oven, yet I persevered and finished cooking them and icing them. And almost 60 cookies later, all I could think about was "what am I going to do with these black and white hockey pucks."

I will say, I am being overly hard on these cookies. I gave my cousin a batch, and though she agreed with me that they were off, the throng of children she was feeding found them delicious. My office mate also approved. And even I came around to a decision that the dough wasn't all that thick after all.

Moral of the story? When you miss a place, you're probably not going to solve that longing with a food you didn't really like to begin with, especially when the things you miss cannot be produced in your oven (you cant bake up a batch of friends, or pinkberry for that matter).

Want the recipe after this glowing recommendation? I, of course, used Deb's. I know that HEB has a version that she and CH served to 40 of our closest friends in college, and I feel like I probably liked those. And I believe EW has even posted a version on this very blog. But since I have come to rely on Deb's pictures and antics to get me through the day, I figured I should do her a solid and try her version. That's all for now. I hope happier food tales are on their way.

Read More...

Saturday, January 30, 2010

Banana Bread 2 Ways

One of the most valuable lessons I learned from living with EW was that almost-bad bananas could be salvaged by putting them in the freezer to use at a later date. This rule has allowed me countless opportunities to make this, and she has further used them to make this.

The problem with this lesson, is that the bananas in the freezer can start to pile up when you have no excuse to make the best and hugest birthday cake ever.* I decided it was time to make some banana bread, but my usual recipe has essentially the same sugar and butter content as the cake. So I started looking around for recipes with less butter and less sugar. Of course, there are all kinds of recipes out there. Some with apple sauce, some with sour cream, some with yogurt. But then there was this recipe with none of those things. Just the standards: bananas, flour, sugar, baking soda, and vanilla. The only addition this recipe has - cinnamon. Oh, and chocolate chips.

I decided to give it a try, and because I had so many bananas, I decided to make two batches, one with chocolate chips and one without. The chipless version is not the most delicious thing in the world (what can I say, butter does make a difference), but it's a nice alternative that's a wee bit healthier. And if you toast it and put some butter or cream cheese on it, it is the best thing ever. The cinnamon really makes a difference. The chocolate chip version, I am happy to report, is not lacking in the least from the missing butter. It's gooey and delicious.

* I did recently make a birthday cake. But the recipient is a chocolate lover, so I made this.

Read More...

Ginger Crisps


I know, I know. I promised to lay off with the ginger posts. And this recipe certainly does not qualify as laying off. But these cookies are really delicious. My mom made them when I was home around Christmas, and they may be one of my favorite cookies of all time. They are super crunchy, and they have little bits of chewy candied ginger inside. I must admit, I've never made them myself, but they are quite delightful. Someday, I'll try.

You can find the recipe here.

Read More...

Happy Birthday to me!

I candied some oranges.  


And then I made a cake.  (Thank you Southern Living!)

Read More...

Monday, January 18, 2010

Blondies

Let's talk about blondies. And why they were the only food item I wanted for more than a week, despite the fact that I've never craved blondies before. In fact, I'm not even sure I'd ever had a blondie before these, and I generally believe things like chocolate chip cookies in bar form are inferior to their cookie counterpart. So, why the blondie craving? Who knows. What I do know is that these hit the spot.

We had them for dessert at the first installment of a series of dinners where we teach my first-ever roommate how to cook. They were the encore to this lasagna. Topped with caramel frozen yogurt, they really hit the spot.

As with almost everything I make these days, the recipe came from Smitten Kitchen. As SK makes clear, these are in fact infinitely adaptable. We added chocolate chips, PB chips and, toffee bits in them. The result? Yum.

Oh, and did I mention, these really hit the spot.


Read More...

Sunday, December 27, 2009

Apple...Bread Pudding?

Every year my dad gets a box of these apples as a holiday gift.


Too bad the rest of my family tends to think of them as some sort of punishment. Why is that? Because what are we supposed to do with 50lbs of red golden delicious apples? They look really pretty, but they are not the best tasting thing you've ever had.

So, on the morning of the 25th, my mom was deciding what desserts she was going to make (yes, that's desserts, plural), and my dad said, "Why don't you make something with apples." We had tried to make apple pie with these bad boys one year, and the result was less than satisfying. But, I remembered that SK has an entire section of her blog dedicated to apples, so I figured I could find something useful there.

In the end, I settled on Deb's mom's apple cake. She is right. This cake is very moist and incredibly tasty. I dare say this is the best thing we've ever done with our annual inundation of apples.


Why then, did mine turn out to be more of a bread pudding (hence the casserole-like pan)? Well, there are many possibilities. Here are the two most probable. First of all, I used 6 apples like the recipe called for (heck, what else are we going to do with them) even though these apples weigh about a pound each. The result was a greatly extended cooking time.

Second, and I only realized this after I went back to the SK website to make this post, I mistakenly tried to flip the cake out of the tube pan instead of serving it upside down like the picture shows. The result? Well, the cake fell apart at the middle apple layer. And because I couldn't very well fix this problem with frosting, I decided to put the cake in a different container. At the time, I decided I would only repeat this recipe in a container like this to begin with. But now that I see that I was never supposed to flip it out of the pan to begin with, I think the tube pan method will produce a very manageable, delicious, and pretty cake.

Read More...

Wednesday, December 16, 2009

S'more Bites Are My Winner


Look at those. Just look. Don't they look delicious? Aren't they pretty? And let's pretend you were a judge in a cookie contest. Wouldn't you vote for these amazing treats? Of course you would. You appreciate homemade marshmallows and graham crackers. Unfortunately, you were not the judges in my unsuccessful bid to win my office's first annual cookie contest. In retrospect, this choice may not have been the most appropriate for the audience, but that's okay because I loved them. And that's what matters. But next time, I will save my confections for a more appreciative audience.

Do you want to know how to do this? Fortunately, it's not that hard.


Ingredients:
- For the marshmallows, look here.
- For the graham crackers go here.
- One bag of good quality milk chocolate chips (11.5 oz?). I used Ghirardelli
- One big bar of bittersweet chocolate. Again, I used Girardelli.

A few notes on the ingredients:

In a recent trip to Penzey's HEB convinced me to buy double strength vanilla extract. The bottle says to use half the amount the recipe calls for or, for special baked goods, use what the recipe calls for. I decided to use the full amount from the original recipe in the marshmallows, and it was amazing. It's definitely worth the extra flavor there, but not in the graham crackers.

And as for the graham crackers, I had a mild disaster. I could not find any graham flour at 3 grocery stores in Chicago. I had to make one batch with graham flour and one without. This process actually taught me an important lesson - regular flour is superior for the limited purpose of making these s'more bites. Why? They cooked a little more solidly and generated many fewer crumbs, which made for better cutting. I'd still prefer graham flour for the graham crackers standing alone.

Finally, don't skip the bittersweet chocolate. You need it to cool down the chocolate when you temper it (more on that later).

Instructions:
1. Spray 13 x 9 pan with cooking oil. Line the pan with parchment paper. Spray the paper, paying particular attention to the sides.

2. Follow the graham cracker recipe to make the graham cracker dough. Instead of making them into round cookies, take about 2/3 of the dough and roll it out in the bottom of the 13 x 9 pan. You can't really use a rolling pin to roll out dough inside a pan, so I used a glass, and it worked great. You could even use your hands if you have to. Bake the graham cracker layer at 350 for about 12-14 minutes. Make the remaining dough into graham crackers that you can eat for instant gratification.

3. While the graham crackers layer is in the oven, make the marshmallows. Pour the marshmallow mix directly on top of the graham crackers and it let sit until the marshmallows are firm (at least 4 hours, I let it sit overnight). Sprinkle the top of the marshmallow with the potato starch/powder sugar mixture before you remove the layers from the pan.

4. Flip the marshmallow/graham combo onto a cookie sheet to remove from the pan. Remove the parchment paper. Flip again onto a cutting board. This second flip is important. I tried cutting these marshmallow-side down and the crumbs from the graham crackers stick to the marshmallows, which looks ugly.

5. Cut the m/g combo into 1 x 1 squares. A large serrated knife works best for this, and you will need to clean it off pretty regularly to keep graham cracker crumbs from sticking to it.

6. Dip the marshmallow portion of the m/g combo into the potato starch/powder sugar mix you made in step 4. Shake off the excess. Try not to get the mixture on the graham crackers. It doesn't do any harm, but it makes them less cute.

7. Prepare the chocolate. After some research and a couple failed tests, I decided the best method was to temper the chocolate. I read some instructions on how to do this online, and found myself pretty confused. I think the basic idea is to get the chocolate just hot enough to melt, and then to cool it down before you begin dipping. How do you do this? There is some complicated version that requires fast hands and a marble slab. Instead of that, I melted the milk chocolate in a double boiler and then added cold bittersweet chocolate to the melted chocolate to cool it off. This seemed to work out fine. Once your chocolate is ready (apparently 88 degrees is the temperature you want...), dip the bites and set them on a plate to cool.

Read More...

Tuesday, December 1, 2009

Thanksgiving Desserts

The dessert menu for Thanksgiving included SK's silky pumpkin pie and a luscious looking ginger pear cake. Both were topped with homemade whipped cream.

As someone who spends more time baking than cooking, I definitely contemplated these two additions to the Thanksgiving table more than any of the other components. It's sort of a shame though - by the time dessert comes everyone is so full nothing tastes that great.

And, for a dinner party of seven people, it was sort of ridiculous to make two desserts. It proved even more ridiculous the recipe for pumpkin pie I followed yielded nearly two pies. So now, I have a pumpkin pie in the freezer. We'll see if it lasts. The reason for the two desserts? My family never has pumpkin pie and I'm still not really convinced I like it. That said, it's certainly a classic of the day and was voted as "non-optional" by at least two of my guests. Which brings me to another Thanksgiving lesson: don't take requests. Your guests will eat what you serve, and like it.

Anyway, here are the recipes and my comments.


Ginger Pear Upside Down Cake:
I got this recipe from Macrina Bakery after stumbling on it on the Seattlest website. I followed it pretty much to the letter. I even emailed the bakery because the baking time seemed to be ridiculously long for a cake in my view. It was a tiny bit long, but not by much. Overall, I really liked this cake, but it doesn't taste much like ginger. In fact the ginger flavor is barely noticeable. That said, it's still really tasty. If I make it again, I might try to add some candied ginger on top, incorporate ginger powder, or something like that.

If you attempt this recipe, here are some important tips. First, make sure you put it on a cookie sheet, and if you're smart line that sheet. The bottom of the spring form pan is filled with a sugary liquid that will ooze out a little. Second, make sure your pears are very ripe but not over ripe. Third, I think it tastes best warm. It was not warm on thanksgiving when I served it, but I have been eating it periodically over the past few days, and I've liked it microwaved for about 30 seconds and topped with whipped cream.

Silky Smooth Pumpkin Pie:
I got this recipe from SK, and tried to follow it to the the letter. I used this pie crust on her suggestion, without the shortening (though it appears she has since changed to a different pie crust). Since I don't think I've had pumpkin pie since I was 12, I'm not sure how it compares to other recipes. But one of my guests, who is not easily pleased, proclaimed "this is excellent pumpkin pie," so I guess that counts as a success. For me, I might add in some of the traditional pumpkin pie spices that were absent from Deb's version. However, I will say that the straining was definitely worth it. My biggest gripe with pumpkin pie has always been that was dense and grainy. This pie lives up to its silky smooth title.

Whipped Cream:
I usually think whipped cream is a waste of calories, but I have to admit that when it's homemade and fresh, I really like it. All I did was put it in the mixer with the wisk beater. I added sugar and about a teaspoon of vanilla and kept the mixer going until it was stiff.

Read More...

Sunday, November 15, 2009

Fried dough = yes


So, SK posted about some apple cider donuts. Knowing heb, I forwarded them to her. And then, when we had 12 hours to spend together, we spent 6 of them making donuts. I thought it would be disastorous, but it turned out MIRACULOUS (though our waistlines might argue otherwise.)

I wouldn't double the recipe next time, unless there were more than two people involved, but damn, these were delicious.

I think the cinnamon sugar topping was best (the apple cider was rather tart), and yes, you do need that whole thing of Crisco. I'm sorry too.

Read More...

Monday, October 19, 2009

Resurgence of a Classic Cookie?


As we all know, Deb is perhaps our greatest source of inspiration. Many among us seem tempted to just make whatever she says. So, lacking creativity of my own, I pondered her snickerdoodle recipe. I had all but decided against it when, to my shock, I got almost the exact same recipe in an email from Saveur.

Partially because I dont want any more of my cooking magazines to go out of business and partially because I dont want to be too reliant on one source of inspiration, I went with Saveur's version. They are seriously pretty much identical, but maybe one day I'll do a taste test to see which one I like more. Yes, I'll do that as soon as I have a need for 96 snickerdoodle cookies in my life.

One thing I will say about this cookie that I had pretty much forgotten about from childhood, it is delicious. I love cinnamon. I love sugar. And this is one occasion where I won't complain about the butter.

Read More...

Saturday, October 17, 2009

Ginger Pear Sorbet


As we've mentioned before, sorbet making is easy and the results are delicious. Recently I bought a pint of pears at the Farmer's Market, to make another dessert. But then I got to making things for an upcoming party, and decided I could not justify making a pie for 10-12 people if I would not be able to serve it at said event. So, I axed the other dessert. But then I had a pint of pears going bad in my apartment. What to do?? Make sorbet!

And, I also had a bunch of fresh ginger in my apartment from a number of only mildly successful attempts to replicate Argo Tea's Iced Green Tea Ginger Twist, so we (I had a visitor's help) decided to add the ginger to the pear.

The result, a delicious frozen treat.

Ingredients
- 1 pint of peeled pears
- 1 cup water
- 1 cup sugar
- about 3 tablespoons of minced ginger.

Instructions
- Boil the sugar, water, and 2 tablespoons of the ginger until the sugar is complete dissolved. Let cool. (Our original recipe says to let the syrup chill, but I don't think that's necessary, as long as it's not burning hot when you add it).
- Puree the pears
- Add the syrup to the pears, puree some more.
- Add the last table spoon of fresh ginger
- Freeze until hard, then take it out and puree it again.

Read More...

Thursday, October 8, 2009

Peach Kuchen

This post may be too little too late because peaches are no longer in season, but I wanted to post my family's lovely alternative to peach pie. This recipe comes from my great aunt, and kuchen is German. But, I don't think this qualifies a legit kuchen. Instead, I tend to think of it as a custard, at least when I bake it much longer than my mom does (she likes it runny, I like it firm).

I almost convinced CH to eat it (even though it involves cooked fruit), and apparently I know more than one crazy person who does not like peaches who also refused to try it. But, I maintain, this "pie" is delicious.

Crust Ingredients:
- 1 1/4 cup flour
- 1/2 tsp. salt
- 1/2 cup unsalted butter
- 2 tbs. sour cream

Filling Ingredients:
- 1 quart fresh sliced peaches
- 3 egg yolks
- 1/3 cup sour cream
- 1 cup sugar
- 1/4 tsp. salt
- 1/4 cup flour

Crust Instructions:
1. Combine all the crust ingredients in the bowl of a food processor and pulse until it forms coarse crumbs (like corn meal).
2. Press into a 10 inch spring form pan. Crust should go onto the sides of the spring form.
3. Bake at 375 until golden brown, about 15 minutes (don't over cook, it's going back in the oven again later).

Filling Instructions:
1. Combine all the ingredients together. You can make more filling if you want a deeper dessert. If it seems to runny, add a little more flour or more peaches.
2. Bake at 375. My mom bakes for 35 minutes. I bake for almost an hour. It's done when you take it out and you can shake it and the filling stands up.

Read More...

Tuesday, October 6, 2009

Brownies are Better with a Little Cheese


In just over a week, I am hosting a concert for David Berkeley. Hopefully, it will be a fun-filled evening with music and delicious food. But, since the concert is going to be on a weekday, I must plan ahead. And since Deb recently describe a reason why she too had a need to cook in advance, I decided to try her apparently delicious recipe for cheesecake brownies.

Or, at least I planned to follow her recipe. But once again, I concluded that Deb uses too much butter. So, I shopped around for some other recipes and made some modifications. Even with 25% less butter and reduced fat cream cheese, the end product is delicious. (Probably because it still has enough fat to cause a coronary.)

When I looked at the brownie recipe on Smitten Kitchen, I decided (1) I needed to double the recipe and (2) that would require 2 sticks of butter, which is outrageous. I also noticed that my mom's brownie recipe called for basically the same ingredients. Turns out, the exact same ingredients in nearly the same proportions.


So, I followed my mom's brownie instructions and then topped it with a double dose of Deb's cream cheese topping. I had one package of regular fat cream cheese and one package of 1/3 fat, so that's what I used, and it was delicious. I also decided to skip the chocolate chips - seemed like overkill.

Deb's freezing-then-cutting tip was key, and something I think I'll do from now on with brownies (even though I have recently made disparaging remarks about putting a whole slab of brownies in the freezer). I cut them into bite sized brownies so that people can have more, and so that more people can have some.

Here are the brownie ingredients:
- 6 oz. Unsweetened chocolate
- 1 1/2 sticks butter
- 6 eggs
- 2 3/4 cups sugar
- 1 teaspoon salt
- 1 tablespoon vanilla extract
- 1 1/2 cups flour

After that, I followed SK pretty much to the letter. Hopefully they'll be a hit. Now I just need some more ideas for things to make!

Read More...

Monday, September 14, 2009

The Best Apple Pie Yet


My friend Jenny and I got a little obsessed with Pushing Daises over our last semester of school. Now that we are free of that time suck, we've devoted ourselves to making pies. The real goal in all this has been to recreate the apple pie that Chuck sends to her aunts. A cheese is always involved, since Chuck's aunts love cheese. We tried the cheese grated on top version, which, while delicious, did not see up to the PieMaker's standards. We also branched out to non-apple pies (because seriously, it's just as easy to bake one as two). Most recently, this effort turned out the almond, pear tart.


(Earlier (and picture-less) was a creme fraiche peach pie that was AMAZING.)

However, the crowning glory of the weekend was the apple pie with gruyere baked into the crust. A small amount of cheese was mixed with the flour before combining with butter and water (much to my surprise, I'm finding that a pastry blender really does do an excellent job at pie making (above the food processor!) -- leaving more substantial chunks of butter to make a more delicious baked pie crust).

The recipe, recreated here from a combination of SK's apple pie making and this blogger's cheesey instructions (I must disagree with and reject his lard-related instructions.)


Crust:
Makes one double-crusted 9-10 inch pie.
2 1/2 cups unbleached all-purpose flour
1 tsp salt
1 tbsp. sugar
20 tbsp. cold, unsalted butter
2 oz. Gruyère, grated
Icewater (get a class, put some water in, add ice. Ready your tablespoon.)

Mix flour, salt, sugar and Gruyere in a large mixing bowl. Using a pastry blender, cut in the butter until "the size of peas."

Sprinkle ice water over flour in increments of one tablespoon, toss with fork after each addition. When dough clumps together when squeezed in your palm (about 6-7 tbsp is generally the right amount), gather dough together into two disks, one slightly larger than the other, wrap in plastic wrap and refrigerate for at least two hours.

Pie:
3 lbs of apples. We used half granny smith and half mcintosh, for what I felt was a perfect level of tart+sweet.
2 lemons. (None of this one tablespoon nonsense. TART!)
6 tbls cornstarch (flour is also an option, but I really like what the cornstarch did in this version)
1/2 cup sugar

Peal and core apples, then thinly slice. Combine in a bowl with other ingredients.

Once pie dough is chilled, roll out the larger disk until it fits a 9 in pie pan (or 9 in springform cake pan, if that is all you have at hand.) Gently settle pie dough into pan (I prefer the fold into quarters method myself.) Pour apple mixture into the prepared pie pan, and roll out second disk of dough. Place on top of apples, and seal edges of pie dough together.

You can brush with egg at this point, though I never do. Place in oven pre-heated to 375F, and cook for at least 50 minutes. I like my apples mushy and my crust crisp, so I would tend to go over this time limit myself, especially if you have a more gentle oven.

Cool for about 20, if you want the pie to stay pie-like, or cut immediately and glory in the deliciousness.
Type rest of the post here

Read More...

Sunday, September 6, 2009

this one was worth it

Blueberry Swirl Ice Cream Sandwiches

I fell in love with the idea of these sandwiches, which were on the cover of Gourmet's August 2009 issue. However, I also pretty much simultaneously fell in love with a batch of KZ's homemade graham crackers that she made while visiting, so I decided to tweak the recipe to accommodate the graham-love.

The sandwich layers turned out a little odd, much more caramelized than I anticipated. However, all-in-all, I'm pretty pleased with these. If I make them again, I will probably stick with the lemon ice cream as in the original, since I think the tartness would be extra delicious.

Here's the recipe with my mods:

For ice cream:

  • 2 pints vanilla ice cream
  • Blueberry compote
For blueberry compote:
  • 2 cups blueberries (10 ounces)
  • 1/4 cup sugar
  • 2 (3-by 2 1/2-inch) strips lemon zest
  • 1 tablespoon fresh lemon juice
  • 2 teaspoons cornstarch
For sandwich layers:
  • 1/3 cup all-purpose flour
  • 2/3 cup graham flour
  • 1/2 teaspoon baking powder
  • 1/4 teaspoon baking soda
  • 1/4 teaspoon salt
  • 1/4 teaspoon cinnamon
  • 1 stick unsalted butter, softened
  • 3/4 cup packed light brown sugar
  • 1 large egg
  • 1/2 teaspoon pure vanilla extract
Equipment: 2 (8-inch) square baking pans (2 inches deep); a small offset spatula

Blueberry compote:

Cook blueberries, sugar, and zest in a 12-inch heavy skillet over medium-high heat, thoroughly crushing blueberries with a potato masher, until juices are released and sugar has dissolved, about 2 minutes.

Stir together lemon juice and cornstarch, then stir into blueberry mixture. Boil, stirring, 1 minute (mixture will thicken).

Transfer blueberry compote to a bowl and chill until cold, about 1 hour. Discard lemon zest.

Sandwich layers:
Preheat oven to 375°F with rack in middle. Butter baking pans and line with parchment paper, leaving a 1-inch overhang on each side, then butter parchment paper.

Whisk together flours, baking powder, baking soda, and salt in a small bowl. Beat together butter and brown sugar in another bowl with an electric mixer at medium-high speed until pale and fluffy, about 3 minutes. Beat in egg and vanilla. At low speed, add flour mixture in 2 batches, mixing until just combined.

Divide batter between baking pans and spread into thin, even layers with offset spatula. Bake until golden-brown but still tender, 10 to 12 minutes. Cool completely in pans, about 30 minutes.

Assemble sandwiches:
Dollop tablespoons of blueberry compote all over ice cream, then swirl it gently through ice cream with a spoon. Spoon all of ice cream over 1 sandwich layer (in pan) and spread evenly using clean offset spatula. Invert second sandwich layer over ice cream, pressing gently to form an even sandwich. Wrap baking pan in plastic wrap and freeze until firm, at least 2 hours.

Transfer sandwich to a cutting board using overhang. Cut into 12 pieces. (Eat with a fork because the sandwich layers are super sticky.)

Read More...